Thursday, December 22, 2011

Winter and Holiday Activity Recap

I have been officially on winter break since last Friday at 3:30 and I am LOVING it! My two favorite things to do when I'm out of school are sleep in (and not have to wake up to an alarm) and read FOR FUN! I have been doing plenty of both things. I've also picked up a cold and cough, but I'm not feeling too bad and even that can't spoil my mood! I'm finally getting around to turning on my laptop to share some of my winter activities that we worked during our literacy block last week... ok, I may have started the Thursday before. There's just so much I wanted to do! We had a penguin/winter/snow themed day, Christmas themed day, Hanukkah day, Kwanzaa day, Polar Express day and a Las Posadas day. My classroom is very diverse and I wanted my holiday plans to reflect that.

One of my favorite Christmas/Winter books is My Penguin Osbert by Elizabeth Cody Kimmel. It's a cute story and who doesn't love penguins?! I like to start off my holiday unit with this book because it gets us thinking about winter and the season. While the story is about a boy who gets a penguin for Christmas, it's really not a story about Christmas. I like to use this story with a graphic organizer because I think it lends itself really easily to a discussion about plot. After reading the story we filled out a snowman graphic organizer together and went through the character, setting, problem, and solution. The students then filled out the remaining two parts on their own since those were more personal opinion responses. I haven't included it because I have to tell you, it's nothing fancy! I drew it myself oh... 7 years ago and I am still using it! We also did a snow globe art activity which you can find here from What the Teacher Wants. They turned out so cute! Although as you'll see from my picture we didn't quite get to the part where you write yet. We'll do that when we come back.

Click on the cover to head over to Amazon and check out this cute book!


Snow Globe Example


For our Christmas themed day, I read Corduroy's Christmas Surprise  by Don Freeman and did a sweet reader's response activity which you can find here from The First Grade Parade. I used that activity last year as well and it was one of my favorites. In her post, Cara references a book that I wasn't able to find so I used the Corduroy book and thought it worked really well since in the end, Corduroy realizes that the best Christmas gift of all was the company and happiness of his friends. Just for fun, I also read Snowmen at Christmas by Caralyn Buehner. 

Click on the covers below to visit Amazon!


For Hanukkah, Kwanzaa, and Las Posadas I did activities that I've been using for years. Some I've gotten from other teachers, some from books and some I kind of made up. I don't have any pictures because I still don't have a camera so I only get pictures if I remember to get out my iPhone and take them while we're working. Some examples of activities I used this year or in past years are making dreidels, eating latkes, making candles or a menorah, making a mkeka (a Kwanzaa mat), making luminarias, making a poinsettia, etc. These are some of my favorite books for these holidays:


Next up was our Polar Express Day. I've been doing this with my team(s) for about 5 years now and it has to be one of my students' favorite days. I love that sweet story. We start off by sending a letter home the week before letting parents know that their child can wear pajamas and bring a favorite mug to school on that day. You could also ask for donations of hot chocolate, but I didn't because I usually find it at Target for about $1.00/box of 10. On the big day, we read the story, watch the movie while drinking hot chocolate and I pass out bells on red ribbon. We also talk about things that were different in the movie and why. It gets the students thinking about the extra details that were part of the movie, but not part of the book, and how they didn't change the meaning of the story, but made it longer and more interesting as a movie. I get goosebumps every time I read the last page of that book and this year was no different!


And finally... GINGERBREAD DAY! I saved this day for Thursday because that happened to be our staff dress up day as well. We were supposed to dress up as our favorite holiday character.

This is me last year with one of the Kindergarten teachers. We were Dancer and Dasher.


And here we are THIS year! Gingerbread girls! Yes, we made our costumes.


There are SO many adorable versions of the classic gingerbread tale... gingerbread cowboy, gingerbread girl, gingerboy pirates, etc. Since most of the kids already know the basic story (and mine had heard it in the library that week), I like to read Gingerbread Baby  and Gingerbread Friends both by Jan Brett. Side note: I love Jan Brett and she has so many great winter books! I love the twist on the gingerbread tale in Gingerbread Baby and then I like to talk about what a sequel is and brainstorm examples before we read Gingerbread Friends. Last year I drew two giant gingerbread houses and we created anchor charts about the texts together. This year we had library and an assembly though so we didn't quite have time for all of that. We did however have time for a fun little craft extension and made our own "gingerbread friends". As I do this, I make sure to bring in how I'm using math and science because I think it's super important for my kiddos to see on a daily basis all the ways people use math and science in the real world. (And I teach at a math and science magnet!) The recipe for gingerbread friends is simple: mix equal parts applesause and cinnamon. That's it. After the dough is mixed (if it's too wet, you can add cinnamon, if it's too dry, add applesauce), I roll it out on wax paper and have the students use gingerbread man cookie cutters to cut out shapes. We then use a straw to make a hole for a ribbon once it's dry. Depending on how thick your cut outs are, you may need a couple of days to dry them. I've also heard that you can also throw them in the oven on a low temp and bake on each side to finish drying. When we make our gingerbread men, I start with 3 cups of each (applesauce and cinnamon) because I like to have PLENTY. I have 21 kids and not only did we make enough for each kiddo to have a gingerbread friend, but after school there was so much left that I cut out stars to attach to their end of the year gifts too. And I still had some dough left over. If you haven't made cinnamon ornaments before, you are missing out. The smell is AMAZING and lasts for a good long time. When your gingerbreads (or whatever shape you're using) are dry, run a ribbon through the hole you punched with a straw, and voila! Gingerbread friends!


Gingerbread books:


And the very last share I have before I wrap up this very detailed post: my gift for my students. Instead of buying them more pencils and erasers and dollar store toys that break immediately, I went for a tried and true crowd-pleaser: Playdoh! I bought a 24 pack of Playdoh for $15 at Target and put one in each treat sack with 3 soft peppermints, 3 Hershey's Kisses, and tied it with a ribbon (and in theory a cinnamon dough star but I ended up just passing those out).

I will leave a picture of one of my treat sacks and the adorable melting snowman cookies that my room mom made with my firsties during our class party:


I hope you all have a wonderful, restful and HAPPY holiday! See you in 2012!


Tuesday, December 6, 2011

Daily 5 Shares

It's December and the 71st day of first grade. AGAIN, where did the time go?! I'm still struggling to find spare minutes to keep up with my little blog and I am really missing it, and all of you.

I'm new to Daily 5 this year and I am loving it. At first, I wasn't sure. I loved the way I did my old centers rotations, but it was so much work on my end to create new things each week and prep the materials, only for the students to visit each center one time during the week. I love that with Daily 5, I can focus on other things that need my time and still give my students meaningful, independent practice while I pull small groups. Word work has always been my favorite part of teaching literacy and I ESPECIALLY love it now with Daily 5. I introduced the word work section of Daily 5 to my kids last. There are SO many choices and I wanted to be sure we were ready. Word work is where I squeeze in all of the fun word sorts, word building games, stamps, puzzles, etc that I've been using for years and didn't want to let go of because I know the kids love them too. There are just so many things to choose from though, that the students often forget exactly what they can go to during that choice. To help provide support for that, I created this visual that I hang up above the cart where most of my word work materials are stored. The students can refer back to this mini-poster when they are looking for something new to do. Click on the picture below to download from Google docs.


My other share is a management tool that I created about a month ago. Before that, I was just trusting my kids to make their own choices and self-manage what they were going to each day. They go to three choices each day, one of which is always read to self, and must visit the other 4 choices at least twice during the week. This still leaves them with 2 blocks left over to go back and visit a favorite activity again. I quickly realized that they wanted to visit everything, but they just couldn't remember where they'd been the day before... and then I realized I couldn't either, so how could I have expected them to?! I made this very plain and simple recording sheet so that they could keep track of (and I could monitor, if need be) where they were going each day and stay on track for the week. I squished 4 weeks onto one page so that they can keep one page for the whole month - the last thing they or I need is another paper (or set of copies) to keep up with or remember to get run off before each Monday. This is our fourth week using the recording sheet and it's going really well! Again, click on the picture below to download from Google docs.


On a completely unrelated note - if you are looking for any new activities, my math stations are currently full of Cara Carroll's Merry and Bright Math Tubs and her Place Value Packet of Fun activities. I highly recommend stopping by TpT for both units - they were well worth my money! I really don't know where she finds the time, but I am sure glad that she does :)! I hope to catch up a little with the blogging world during my precious 2 weeks off... but just in case I don't, enjoy your last days of 2011 and stay warm! It's even cold in Texas this week!!!

PS - I've gotten lots of comments and emails about the homework menus. I have to tell you that they are going SO well. I really encourage you to try using a homework menu sometime soon! The products I'm getting are wonderful work samples and for the first time ever, I get homework from every child *almost* every week! The kids love it and I love it - what could be better?  Email me at FantasticFirstBlog{at}gmail{dot}com if you would like to see more samples or have any questions!

Saturday, November 12, 2011

We've got lots of catching up to do!

It's been almost 6 weeks since my last post. Where did October go? And are we really halfway through November already?! (Anyone else looking forward to the upcoming holidays and their breaks?) I've had "Blog Post" on my to do list for weeks now... but it just kept getting pushed to the bottom [side note: I'm loving the new iOS5 software and the "Reminders" app!]. Let's see... what have I been up to since my last post? Well just to name a few things: a field trip to the Dallas Arboretum (awesome pumpkin patch/village!), several phone and face to face conferences, meetings, meetings, meetings, meetings, meetings, meetings, meetings, a 4 day trip to Sonoma and Napa, a trip to Austin, the Texas State Fair, the (very disappointing) Texas - OU game, attended professional development, taught professional development, had a sleepover at the hospital with my granny (she's fine now!), prepared and practiced a presentation for the school board with Mrs. Claborn (eeeeek!) and... that's in addition to all of the normal things us teachers do everyday! I really am in awe of all of the super teachers out there who manage to get through all of that while taking care of their families and kids too. I just have to take care of me and there are definitely times when I find that to be a challenge! Things have been crazy busy. I probably haven't been getting enough sleep but I have been making myself keep up with my favorite workout (pure barre) and I think it's helped keep me sane! I feel so disconnected from blog world - not only have I not posted since October 5th, but I have to admit that I haven't been reading any blogs either. I KNOW I've missed tons of cute pumpkin and Halloween things! As my title suggests, I've got lots of catching up to do - both sharing and reading!

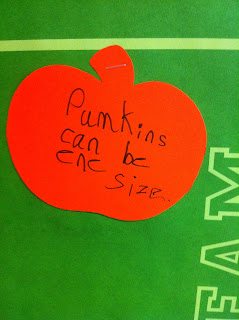
Today I'm just going to share a post that I started on October 16th and never quite finished - Pumpkin Day! We went to the Dallas Arboretum on October 13th and just as I suspected, the kids were AMAZED by the many colors, sizes and kinds of pumpkins there and really wanted to know more about pumpkins. So we declared October 14th to be our "Pumpkin Day". (It really would have been a bummer if they hadn't been since I had already planned our pumpkin day and traced 22 pumpkin books!) It was a great week for it because it was a 3 day school week, and with the field trip, really just a 2 day week class wise for us. Here are a couple of things we did:

Read pumpkin books and created a class anchor chart

Created pumpkin books and wrote about pumpkins
"Pumpkins grow from a flower on a vine. Pumpkins can be orange or more colors. We saw MANY pumpkins at the Arboretum."

"The pumpkins can be small or big. The pumpkins can be red. When it is Halloween, you can get a pumpkin!"

"Pumpkins can be blue or yellow. They have seeds inside. Pumpkins are round."


Shared our favorite pumpkin facts with other students through our bulletin board in the hallway

We took a lot of neat pictures of bumpy pumpkins, white pumpkins, striped pumpkins, blue pumpkins, giant pumpkins, tiny pumpkins... you name it! My firsties really enjoyed looking back through the pictures the next day and even the next week! If you live in the Dallas area, this is a great time of the year to check out the Arboretum!

I'll be back soon with more things to share - more homework menus, short vowel word sorts, pattern stations... and whatever else I've taken pictures of! Have a great weekend blog friends!

Wednesday, October 5, 2011

Using Menus for Homework

If you saw this post by Mrs. Claborn a few weeks ago, then you already know that she's using menus for her second graders' homework. After just 2 weeks of homework in first grade, I decided it was time to change ours up too! First grade is now also doing menus for homework and the feedback has been GREAT! This is our very first homework menu, so it's a work in progress. Like Mrs. Claborn, we're using the Laurie Westphal Differentiating Instruction With Menus for inspiration. Our principal got a set for each grade level and they are a fabulous resource! I created our menu to look like a restaurant menu with three categories: Entrees, Appetizers and Dessert. Within each category, there are 3 choices. The students choose one from each section to complete throughout the week in addition to their reading logs. We just sent the first menu home on Monday and on Tuesday morning the kids were SO excited to tell me what they'd chosed to work on so far! I can't wait to see what they bring in on Friday! Anyway, you can check out our menu below. When we send it home, it has a reading log on the back and a list of about 30-40 example short o words for them to study for our spelling test on Friday. If you're interested in how we do spelling, check out this post.


October 3

Saturday, October 1, 2011

Last Week of School Texas-Themed Activities (Yes, you read that correctly)

So here is a post that I apparently started on June 8, but never finished. I'm having a little bit of a lazy Saturday today so I thought I'd finish it up and post it, even though I'm sure everyone's Texas units are a long way off. You can just file this away for later!

(Written on 6/8) School finished on Thursday for students and it's taken me this many days to even turn on my computer, much less write a new post. I wanted to share a few crafty activities I did with my sweet firsties-now-second-graders. My team decided to save our Texas unit for the last week this year so that we could have something fun and engaging to do, even though some of our curriculum materials are already packed up/turned in. I loved it! It was a really fun last week before sending them off!

I'm picking this post up here on October 1st... and now of course I can't remember all of the great books I read and all of the activities that I did. I know I have them written down at school in my Texas unit file, but I don't have that with me right now... so instead I'm going to share my 3 favorite non-book related. In first grade so many of the things we do when working within a theme are responses to reading, but the things I'm going to share today are just some fun extra little things we did to enjoy our last week together and sneak a little learning in at the same time.

Lone Star Crayons


The kids thought this was magic. They LOVED it and it was a great science connection. We talked about heating and cooling and about how the crayons were a solid then a liquid, then a solid again. I did this in the classroom with the kids just using a toaster oven. I've included the instructions below. If you're not teaching in the great state of Texas, I am sure you could adapt this and make your own special crayons, but they might not be as cute;). Just kidding! I could definitely see some of my Louisiana friends making purple and gold fleur-de-lis crayons!

You will need:
Old crayons (red, white and blue)
Non-stick cooking spray
A cupcake or muffin tray or other star shaped mold (I used silicone ice cube trays)

Preheat your oven to 300 degrees. Peel the paper off of the crayons and break or cut them into small pieces. It depends on the size of the mold you are using, but you will probably want them to be smaller than 1 inch. Spray the tray or pan with non-stick spray. Fill the cups or molds with crayon bits. Bake for about 8-10 minutes, or until they look completely melted. Take them out and let them cool. Enjoy your new crayons!

*Note: I put mine in the fridge for about 2 hours and they were completely cooled and ready to use!


Playdough Texas (Disclaimer - I have NO idea why Blogger keeps flipping my pictures. I didn't take them upside down, nor are they upside down when I view the file on my computer. Yet every time I insert these into Blogger they come up like this. I give up.)


We made red, white and blue homemade playdough. The kids helped me measure, mix, dye and knead the dough. Everyone chose which color they wanted to use for their Texas. I had them first trace Texas onto the paper plate so that they could use that as a guide for molding the playdough. When they finished, they used a toothpick to mark Austin and Richardson. That's really hard to see that on my low-quality, upside down iPhone pictures though! When everyone had finished their Texas, we tallied and graphed how many people chose each color of dough. It was super messy and even more fun! Again, I'm including the instructions although I'm sure you can find these anywhere, it's a very simple water, flour and salt recipe.

Playdough
1 cup flour
3/8 cup salt
3/8 cup warm water
Food coloring (optional)

Mix all ingredients together with a  spoon, then knead with your hands for about 5 minutes. You may need to add more water or flour if it's too dry or wet. Have fun!


Texas Flip Book


We worked on these throughout the course of this 3 day unit. As you can see, this example is very detailed. Not all of the books looked like this! The students decided what information they wanted to include on the book. We worked on 2 flaps per day, so on the first day we worked on the cover, labeled the tabs and worked on the first flap. Each day they would draw a picture and label the information for that particular tab. It was a great way to show and record what they'd learned about Texas throughout the week.  


Thursday, September 29, 2011

Teacher Tip

I'm just stopping by VERY quickly to share a little teacher tip with you. If your classroom has desks that you put together into table groups, this post is for you. This something that I shared with our new teachers when I worked with them for district training and it came up again when we had some staff developments in my room, and as I realized that not everyone new about this trick, I knew I had to post about it! It wasn't my original idea, my former roomie, Miss Parkerson, shared this idea with me and I thank her for that everyday. It drives me CrAzY when the tables and desks seem to migrate across the room. I thought when I moved to a room with carpet that would get better. It didn't. They just make less noise as they move and slide across the floor. I don't even know how it happens. I never actually SEE anyone pushing desks. All I know is when the kids leave, my desks look nothing like the arrangement they were in at 7:30am. Are ready for this??? You need zip ties. That's it. Yep, I get down on the floor and pull all the chairs out and zip tie the desk legs together. Try it. It just might change your life. And if you get lucky, like I did, you might even find "cute" zip ties! I bought packs of zip ties from Dollar Tree and they came in these great bright shades of  blue, green, orange and pink. Which probably explains why other teachers notice them when they visit my room. Happy zipping!

Wednesday, September 28, 2011

Science Week - Favorite Videos or Websites

I'm catching up on this post from yesterday's Science Week topic - favorite science videos and websites. I have two resources for videos that I absolutely love for science and use on a regular basis. I feel bad sharing these, because they both require logins and so I can't really give you a good preview. My district provides these for us through the library SO maybe you can check with your librarian and see if you have access - I hope you do! Saying that I use these on a regular basis is a big deal because I don't like to use videos very often during science. Our science time is at the end of the day, it's never enough time for all I want to do and I like to do everything hands on and messy! Every now and then though we need a little more information or I need to introduce a new topic and that's when I use these.

1. Discovery Education and Discovery Education Science - in addition to the amazing video database, you can also find games, lessons and more. Seriously, I've never searched for something and NOT found it on here. It's an incredible resource to have access to! If you already use Discovery Education, make sure you've checked out the "Science Elementary" tab and explored there. It's broken down by Life Science, Earth Science and Physical Science, with a wealth of subtopics within each one of those. Again, all I can say is AMAZING!

2. Pebble Go - This is a really first grade friendly way to have your kids research science topics using the web. Like Discovery Education Science, the website is set up by units and within each, you'll find even more subtopics. The kids can read the information, but best of all, they can click to have it read to them! Of course, they also have great videos. We just used this site last week when we were talking about pets and it's great for other animal research projects.

What websites and videos do you use to get your kids engaged during science? Go link up!

Monday, September 26, 2011

Science Week - Favorite Book

It's Science Week over at Teaching Blog Addict and since I teach at a science magnet school, I thought I'd better participate! This is REALLY hard for me! I have SO many great science books and I love them all! The book that I'm sharing with you is my favorite from our Ladybug unit in the spring. I wanted to share it because it comes in several versions for different kinds of insects so you might be able to find one that suits your own needs in terms of an insect unit. It's called Are You a Ladybug? by Judy Allen and Tudor Humphries. It's a cute story that goes through the important characteristics of a ladybug and at the end, ties it in with how ladybugs are different from children. Cute, cute, cute and informational - love that! Click on the picture below to check it out on Amazon! What's your favorite science book?

Saturday, September 24, 2011

Bar Models for Smart Software

One of my favorite tools to teach addition and subtraction  in first grade is a bar model. I started using the part-part-whole diagrams when my district first adopted Envision because I think it really helps my students to visualize what information they have, what they need to find out and therefore, what operation to use. This year, my district's math department is really pushing teachers to use these and I'm excited about that since this is really the best way I've found to teach a sometimes difficult concept.

I've created a very simple Smart activity so that I can introduce using these and model during guided practice. We're starting our first addition and subtraction unit this Monday and I plan on using these often! There are 3 pages in the download - a part-part-whole model and two different comparison models. I included two comparison models because I personally like the one on page 3 better (to me, it makes more sense to have a line as your difference because it shows that you need that amount to get to the bigger part and the oval just looks like a separate part), but the model on page 2 is supposed to be for use in K-2, so I want my students to see it, be familiar with it and know how to use it. I wouldn't want the fact that I used a different model to keep them from showing what they know on a district assessment or confuse them when they got to 2nd grade. Each page has "infinite cloned" counters so that you can model problems as well as a space for a number sentence. Click on the preview below (or here) and download it for free from Teachers Pay Teachers.


What's Inside My Teacher Bag?

I'm a couple of days behind on this but here I am anyway, linking up with The Inspired Apple to share what I lug back and forth every day in my teacher bag.

This is my favorite bag. It's from LL Bean and it's about 6 years old. It was recently washed and now has those lovely wrinkles all over. Every inch of that bag is filled and it can be SO heavy, but that bag is super sturdy. I love it. 


This is what's inside:

My planner

A pencil box - this is a new addition. I had to start putting everything in there because I was tired of finding post-its on everything! In my pencil box I carry post its, post it flags, my favorite mechanical pencils (Pentel Icy), Sharpies and Flair Pens.

My laptop bag. I love this bag and I'm very sad because we're getting new laptops next week and the new ones are too wide for my case :(

This is my lunch bag. I'm also always either carrying this or stuffing it into my LL Bean bag too. And of course, no teacher at my school is ever without a giant Tervis tumbler full of water!

Other things in my bag that you can't see: lesson plan book, to be graded papers, Treasures TE, Envision TE and/or math unit resources, pacing guide binder, Daily 5 book, random notes from children, an iPhone/iPod cable and stickers. I'm almost surprised that I've never bruised my shoulder!

What's in your teacher bag? Link up and share at The Inspired Apple!

Thursday, September 22, 2011

Two Great Web Resources

I know all of us in blog world LOVE technology - that's we're blog authors and readers! Here's a quick post about two new-to-me web resources that I think you might love too.

1. Tizmos - This site has revolutionized my computer centers. And I'm not exaggerating. This is a site where you have a personal homepage and can bookmark sites as screenshots. What I love about this site is that you can add tags or labels so that your sites can be sorted, if need be. Example: This week we're studying geometry. I added 12 activities to my page (www.tizmos.com/MGriffin) and tagged them with "math" and "shapes". If I had math sites bookmarked for several different skills but only wanted geometry, I could sort through and show just the sites that I'd tagged with "shapes". How cool is that? I LOVE this because even though I know I can add things to my favorites, sometimes my favorites get SO full that my kids have trouble navigating them. Another reason I love it is because I can access it from anywhere. We visit our computer lab a lot and it drives me crazy that I don't have all my favorites marked in there every time we go. With my Tizmos page, I can take them with me! LOVE. THIS. SITE. Oh, did I mention it's FREE?!

2. Interactive Geoboard - As I mentioned, we're in a geometry unit. Today I pulled up this site on my laptop and projector while my kids worked on geoboards at their desks. I was able to guide them if needed or let them show what they did and they just ate it up! They asked if it could be added to math stations and could I please email it to their parents so they can do it at home...YES! OF COURSE! My favorite part of this site is that after you have created a shape, you can click on one of those color boxes and it will highlight the space inside the rubberband. That was a great visual for my students who were having trouble seeing the shapes with just the outline.

Do you have any sites that you can't live without?

Wednesday, September 14, 2011

Daily 5 Posters

I've had some fellow teachers visiting my classroom these last couple of weeks and many of them have been interested in my Daily 5 Choice Chart. SO, I thought I'd share it here so that it would be available for anyone who may find it useful. I wanted to post it back during the first week when I posted my Friday Freebie "I Pick" chart, but I didn't have my Scrappin' Doodles blog license yet. Now that I got that taken care of... here you go! First, I have to give credit where credit is due. This chart was a team effort. I was chatting with my favorite collaborator, Mrs. Claborn before school started and we were bouncing around some ideas about our new Daily 5 adventure. I thought a clip system (like my behavior chart) would work and be easy for the kids (and me!) to manage. She went back and created an ADORABLE chart that went along with her cowboys and cowgirls theme (click here for her chart), and I took hers and swapped the clip art so that my firsties have a visual of what they will be working on. You know how firsties need those things! Click on the pictures below to download my choice chart and my header that hangs above it.


Monday, September 12, 2011

Making Spelling Meaningful

As a student, I hated spelling. I was good at spelling and thought it was a waste of my time. It wasn't too far into my teaching career when I realized I felt the same way about giving spelling tests. I would get so frustrated when my kids would study the words all week, get them all right on Friday... and not have any clue how to spell them the following week. Someone I knew had once told me that his daughter who was in junior high in a private school took spelling tests based on spelling patterns and one day it came to me... bingo! First graders can do that too! Instead of giving my students a word list, I give them a target sound and spelling pattern. We brainstorm words, create anchor charts and do word work with our sound and pattern throughout the week. When Friday comes, they know I will call 10 words based on those skills. I love testing this way because it requires that my kids think about and apply the skill, rather than just memorize. This week our sound is short /i/ and our spellling pattern is CVC, so I might call words such as big, lip, or kid. As we go through the year and study more sounds, the words may get more complex. After we've studied things like blends and digraphs, I might call words with those as well as the target vowel sound and spelling pattern. I really feel like my students are better at spelling as a result and are able to spell more words than just a 10 word list correctly. The great thing is that you can still differentiate your spelling words to meet the level/readiness of your students. For example, some kids may be ready for short i words with digraphs and blends like chip, ship, whip, or slip, while some stick to the short i words I listed above.

It's always easier to start something new like that when you can get your whole team on board with you, so I explained my idea to them and being the fantastic teammates they were, they were willing to try it with me. We started by sending a letter to explain the new method to our parents. Getting them (the parents) to understand why we would want to do it this way and how they can still help their children study for the test was really important.

Here are some examples of what I've sent home to explain this method to parents. My google docs keeps signing me out so I'm trying something new and uploading with Scribd... hope this works! The first file is text that I pulled off of a slide from my curriculum night presentation. The second file is a parent letter that I used last year when we made the switch from word lists to word families. Feel free to use it in your own classroom!

Spelling Test Policy

New Spelling Test Letter

How do you make spelling meaningful for your kiddos?

Monday, September 5, 2011

Simple Spinner

I hope everyone had a great 3 day weekend with lots of fun, family, friends and football! I'm stopping by really quickly to share a very simple spinner. I'm going to use this to add some challenge to some of my math games. For those of you who use Envision, I like to take those topic games and turn them into file folder games for math stations. I will use these spinners with some of my math games from last week to add a little challenge and continue building our number sense. The idea is that my students will still spin the game spinner or roll a die, and then spin this and have to add or subtract 1 or 2 from that number. It would also be a great addition to a game like Chutes and Ladders. Of course there are a million uses for a spinner and in the near future I plan on making different spinners to help me differentiate activities - they might say things like 10 more, 10 less, etc. Anyway, click on the images below to download my blank spinner or my programmed more/less spinner. It took me less than 5 minutes to make this, but hey if I can save you 5 minutes by sharing it with you, I love that!Have a FANTASTIC week!


Saturday, September 3, 2011

Favorite Summer Memories

Good morning blog friends! I'm sure you are all breathing a sigh of relief knowing that the weekend is here and that you probably have a three day weekend. Finally - a little time to catch your breath and catch up on sleep! At least, that's how I'm feeling :)! So here I am on Saturday morning getting ready to go to Austin for the FIRST Texas game! Wahoo! As I was getting ready, I realized the first football game is what REALLY makes it feel like summer is over for me. To celebrate the start of football season - and I'm sure hoping this one is going to be better than the last - and commemorate the end of summer - I thought I'd share some of my favorite memories. I'd love for you to share too and link up in the comments section! Here we go in chronological order:

1. Vail! We went for a wedding and it was my first trip to Colorado. Such a beautiful place! 


2. River Trip! I think I've done this every year since I was in college. I don't know what my summer would be like without a float down the Guadelupe or Comal! This is a picture from the balcony of our condo which looked out over Canyon Lake.


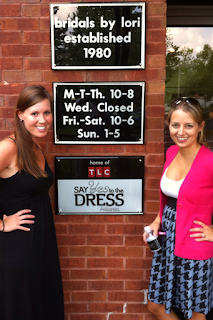
3. Atlanta! My best friend is now living in Atlanta with her fiance, so I went on a very last minute, long weekend trip and had a great time! Of course while I was there we had to go check out bridesmaids dresses.


4. Hanging with Bevo! Yes, it's the REAL Bevo. He came to visit Dallas for a joint 30th birthday party we attended. Hook 'em!


What are you favorite summer memories?